Introduction
In today’s digital age, knowing how to use a computer is an essential skill. Whether you’re looking to improve your productivity, stay connected with friends and family, or simply explore the internet, understanding the basics of computer use is the first step. This guide is designed to help beginners learn the fundamentals of using a computer, from understanding the different components to mastering basic operations. By the end of this guide, you’ll have the confidence to navigate your PC and start using it effectively.
1. Understanding the Components of a Computer
Before diving into how to use a computer, it’s important to understand the different parts that make up a PC. Here’s a breakdown of the key components:
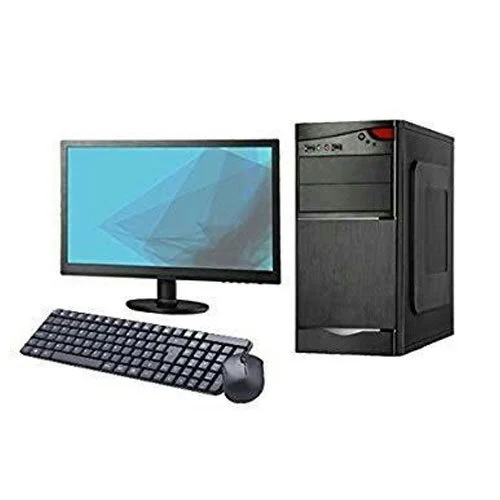
- Monitor: The screen that displays the visual output from the computer. It’s where you’ll see all your programs, documents, and media.
- Keyboard: The input device used to type text, navigate, and execute commands. Keyboards are typically arranged in a QWERTY layout, and they include function keys (F1-F12), a numeric keypad, and special keys like Shift, Ctrl, and Alt.
- Mouse: A pointing device used to interact with items on the screen. It allows you to click, select, drag, and drop objects.
- Central Processing Unit (CPU): Often referred to as the “brain” of the computer, the CPU processes instructions and performs calculations. It’s housed in the computer tower or laptop body.
- Hard Drive (HDD) or Solid-State Drive (SSD): These are storage devices where your files, programs, and operating system are stored. SSDs are faster and more durable than traditional HDDs.
- RAM (Random Access Memory): RAM is temporary memory that your computer uses to run programs and process tasks. More RAM generally means better performance, especially when multitasking.
- Operating System (OS): The software that manages the computer’s hardware and software resources. Common operating systems include Microsoft Windows, macOS, and Linux.
2. Setting Up Your Computer
Once you understand the basic components, the next step is setting up your computer. Here’s a simple guide to getting started:
- Unbox and Inspect: Carefully remove the computer and its components from the packaging. Ensure all parts, including cables, are present and undamaged.
- Connect the Monitor, Keyboard, and Mouse: If you have a desktop, connect the monitor to the CPU using a VGA, HDMI, or DisplayPort cable. Plug the keyboard and mouse into the appropriate USB ports. For laptops, these components are built-in, though you can connect external devices if needed.
- Power On the Computer: Plug the power cable into the CPU or laptop and the other end into an electrical outlet. Press the power button to turn on the computer.
- Follow the Initial Setup Wizard: When you power on your computer for the first time, you’ll be guided through an initial setup process. This typically includes selecting your language, time zone, and connecting to a Wi-Fi network. You’ll also need to create a user account with a username and password.
3. Navigating the Operating System
Once your computer is set up, you’ll need to familiarize yourself with the operating system. Let’s take a look at the basics of using a common operating system, Microsoft Windows:
- Desktop: The main screen you see after logging in. It typically features icons for easy access to programs and files, a taskbar at the bottom, and the Start menu.
- Taskbar: Located at the bottom of the screen, the taskbar displays open applications, provides access to system settings, and shows notifications.
- Start Menu: Accessed by clicking the Windows icon in the bottom-left corner, the Start menu is your gateway to installed programs, settings, and power options.
- File Explorer: This is where you can access your files, folders, and drives. It’s an essential tool for managing documents, photos, and other media.
- System Tray: Located on the right side of the taskbar, the system tray displays the clock, volume control, network status, and other system notifications.
4. Basic Computer Operations
Now that you’re familiar with the layout of your operating system, let’s explore some basic operations:
- Opening and Closing Programs: To open a program, click on its icon from the desktop or the Start menu. To close a program, click the “X” button in the top-right corner of the program window.
- Creating and Saving Documents: Open a word processing program like Microsoft Word. Start typing, and when you’re ready to save, click on “File” > “Save As,” choose a location, and give your document a name.
- Using the Internet: Open a web browser (e.g., Google Chrome, Microsoft Edge) by clicking its icon. In the address bar, type a web address or search term and press Enter to browse the internet.
- Copying and Pasting: To copy text or files, select the item, right-click, and choose “Copy.” To paste, right-click in the desired location and choose “Paste.”
- Organizing Files: Use File Explorer to create new folders, move files, and keep your documents organized. Right-click inside a directory, select “New,” and then “Folder” to create a new folder.
5. Basic Computer Maintenance
To keep your computer running smoothly, regular maintenance is important. Here are a few simple tips:
- Update Your Software: Ensure your operating system and programs are up-to-date by regularly checking for updates. This helps protect your computer from security threats and ensures you have the latest features.
- Install Antivirus Software: Protect your computer from viruses and malware by installing reputable antivirus software. Keep it updated and run regular scans.
- Back Up Your Data: Regularly back up important files to an external drive or cloud storage to prevent data loss.
- Clean Your Computer: Dust can accumulate inside your computer and cause overheating. Use compressed air to clean the vents and keyboard periodically.
- Uninstall Unused Programs: Free up space and improve performance by uninstalling programs you no longer use. Go to the Control Panel > “Programs and Features,” select the program, and click “Uninstall.”
6. Troubleshooting Common Issues
Even with the best care, you might encounter some common issues. Here’s how to troubleshoot them:
- Slow Performance: If your computer is running slowly, try closing unnecessary programs, clearing temporary files, or adding more RAM.
- Frozen Screen: If your computer freezes, press Ctrl + Alt + Delete to open the Task Manager. From there, you can end unresponsive programs.
- No Internet Connection: If you can’t connect to the internet, check your Wi-Fi connection, restart your router, or run the Windows Network Troubleshooter.
- Program Crashes: If a program crashes frequently, try updating it, reinstalling it, or checking for system updates.
7. Exploring Advanced Features
As you become more comfortable with basic operations, you can start exploring advanced features:
- Personalizing Your Desktop: Customize your desktop background, screen saver, and theme by going to the Settings menu.
- Multitasking: Learn how to use multiple windows and virtual desktops to increase your productivity.
- Keyboard Shortcuts: Familiarize yourself with common keyboard shortcuts (e.g., Ctrl + C to copy, Ctrl + V to paste) to work more efficiently.
- Installing New Software: Discover how to download and install new software programs to expand your computer’s capabilities.
- Using Cloud Storage: Explore cloud storage options like Google Drive, Dropbox, or OneDrive to access your files from any device.
Conclusion
Learning to use a computer as a beginner might seem daunting at first, but with practice, it becomes second nature. This guide provides the foundational knowledge you need to start using your PC effectively. Whether you’re writing documents, browsing the internet, or exploring more advanced features, the key is to take it one step at a time. With patience and practice, you’ll soon be navigating your computer with confidence, opening up a world of possibilities in the digital age.

